Automated Mix
Once you have generated the text-to-speech output, you can start the automated mix. Your audio file is mixed with the original sound and then the volume is adjusted. The whole process only takes a few minutes!
How to Create an Automated Mix
- Open your project.
- Scroll down to the Files section.
- Open the context menu of a tts file. *
- Select Automated Mix.
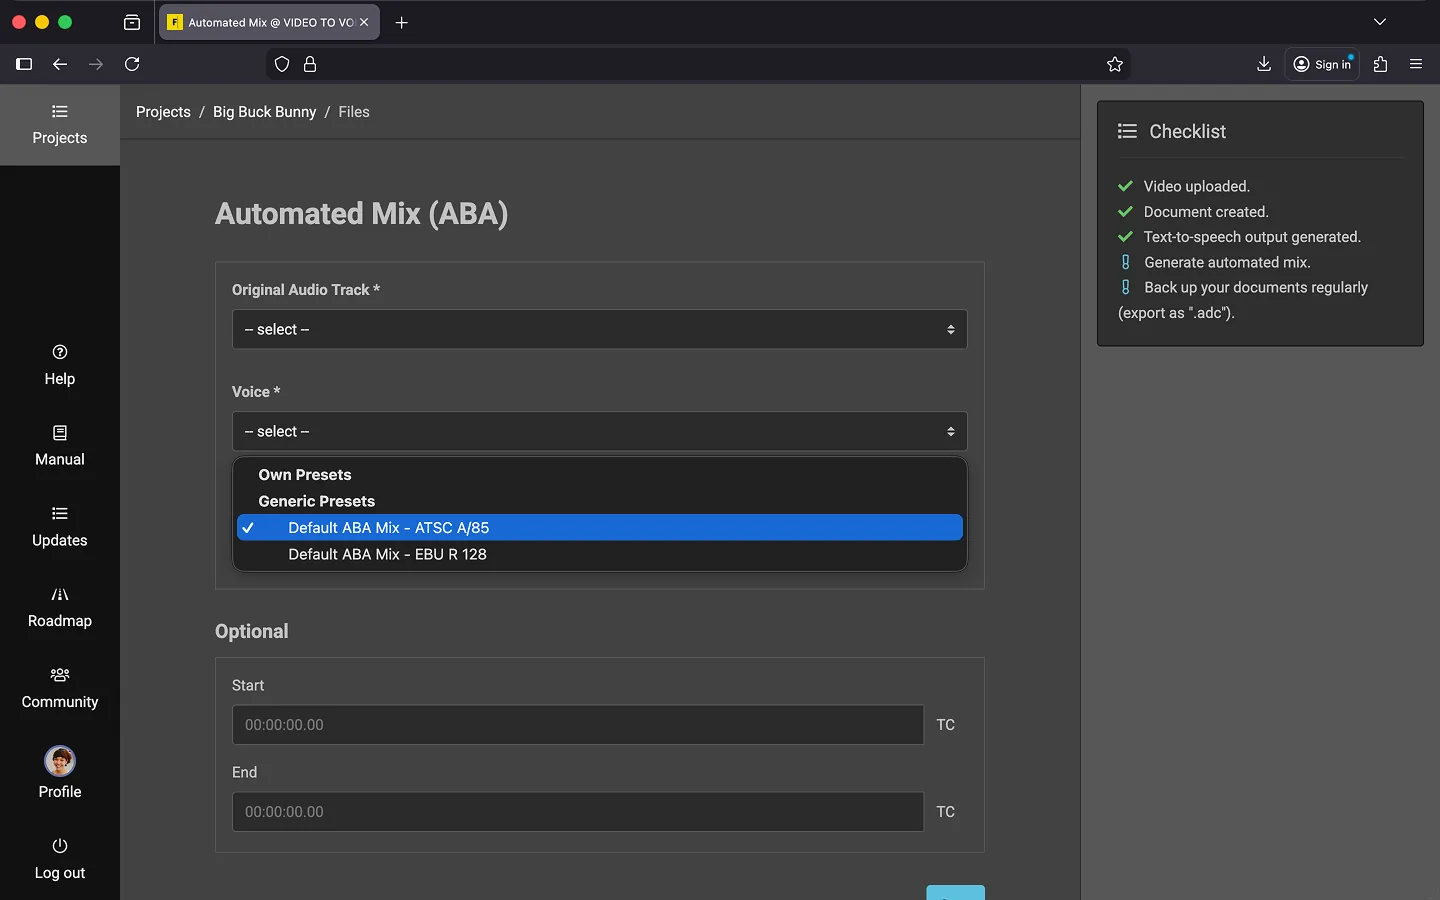
- Select the original audio track*.
- Select the voice output. *
- Choose the preset for the mix.
- Default ABA Mix - ATSC A/85
- Default ABA Mix - EBU R 128
- Optionally, export only a short excerpt by entering a Start TC and an End TC.
- Click on Start.
*Note: If you don’t see any tts files in your list, ensure you’ve already generated the text-to-speech output for your document (see the previous chapter)..
**If you’ve generated the voice output multiple times, make sure to select the correct file. File names include a date, and the list is sorted by date (the most recent output appears at the top).
Download
Two audio files are generated. By default, you’ll need the file of type mix. The adm file type is only relevant for projects using MPEG-H Audio.
*Tip: You can repeat the mix with different settings if, for example, you’re not satisfied with the volume adjustment or need multiple levels for different scenarios. There are no additional costs for this. Refer to the Billing chapter for more details.
Optional
You have the option to enhance the automated mix by providing better audio tracks.
Replace Original Audio
The audio track in the uploaded video may not have the best quality available. You can replace it before mixing by uploading a stereo WAV version (48 kHz).
- Scroll to the Files section in the project overview.
- Open the submenu of the original audio file (identified by the type audio).
- Click on “Replace audio file”.
- Select a new file.
- Click on Save
Upload Voice track
You can also upload a voice track for use during the mixing process. For further details, please contact support.
Optional: Create new video
You can export the final audio description as a new video, replacing the original audio track.
- Scroll down to the “Files” section.
- Open the context menu of the generated audio track (type: “mix”).
- Select the “New Video” option.
- Select the video and audio track. Note that multiple versions may be available depending on the number of mixes you’ve created.
- Click on “Start.”
A placeholder (type mix_video) will appear in the Files section. Wait until the process finishes and the file name appears.
Last Update: 2026/05/13